I've been baking a lot of bread lately. This. stuff. is. awesome. I'd love to have you all over for a slice of bread with butter and jam, but that isn't possible. So, I figured that sharing the recipe would be the next best thing. :) (I love how this loaf slightly resembles the shape of Wisconsin. Ha!)
I got the recipe from a friend, so we've affectionately dubbed it "Ben bread". I did a little tweaking to the recipe, because that's what I do. I've baked this bread up to five times in a week! It's that good.
To make Ben bread you will need:
1 1/2 cup water
2 tablespoons olive oil
4 tablespoons sugar
2 teaspoons salt
3 1/2 cups flour
3/4 cup rolled oats
2 tablespoons ground flax seed
2 tablespoons milk
2 teaspoons active dry yeast
Place all the ingredients in a bread machine and use a basic bread setting.
I don't care for how my bread tastes when it's baked in the bread machine itself, so I set mine on the dough setting. After the dough is done, I place it in a greased bread pan, let it rise in the pan until the dough is about an inch over the sides of the pan. Bake in the oven at 350 degrees for 30 minutes.
It's great fresh out of the oven. It's great toasted. It's awesome with a slathering of butter and jam. Or butter and honey. Or just butter. It's worth your jeans getting a little bit snug. Maybe. :P
Thursday, April 07, 2011
Tuesday, April 05, 2011
Art Quilt Collection
The Art Quilt Collection: Designs and Inspiration from Around the World is a gorgeous and inspiring book. It is mainly filled with photos of beautifully made quilts by artists from all over the world (as the title states :) ). Each quilt featured has a brief write up about the inspiration behind the quilt and the materials used. In addition to the beautiful quilts, the book includes brief step by step sections explaining some of the techniques used. Some of these techniques include: pleating fabric, adding color photographs to fabric, oil-based painting, how to make free hand fabric blocks, and more. For me, (not being an art quilter), it was very interesting and informative to read the how-to sections. I actually hope to try out a few of these techniques in the future.
Some of my favorite quilts from the book are:
I loved the tiny windows in each block. And the use of color is excellent! The grey borders really appeal to me as well.
I love, love, LOVE blue and green together, so it's no surprise that this one would be on my favorites list.
This one just blew me away. I makes me want to grab all my neutral scraps and get piecing. It is amazing!
Oh, this one might be my very favorite. I love the depth that this quilt has and I love all the color! (It's made by a fellow Wisconsin quilter. Woo-hoo!) And I love the name of it, too. It's good, good, good all around!
I have enjoyed this book very much. I am sure that it is one that I will look to again and again for inspiration.
If you would like to win a copy of the book, leave me a comment on this post. The publisher, Sixth and Spring, will be giving away a copy to one of my readers. I will pick a random winner sometime on Thursday.
Monday, April 04, 2011
3 things
1. I made this little dresden pincushion last week. Isn't it fun? It measures 4.5" square. It was a great reason to play with scraps, which I seem to never tire of doing. :) It was also so nice to start and finish a project in one day.
2. Margaret's Hope Chest is celebrating 4 years of sharing quilts with those in need. They recently gave away their 1000th quilt! How exciting is that!? To celebrate this huge event, they are hosting a giveaway on their blog with some great prizes, including this set of fat quarters. Check out all the details here. They are also looking for quilt top donations, which would be a great way to whittle down your work in progress pile, if you are so inclined.
3. THANK YOU to all of you who bid on the FMF fabric on ebay. The auctions were a huge success and I appreciate all the sales. I will be able to make a significant donation to Convoy of Hope because of you. Thank you so very much!
Happy Monday to you!
Thursday, March 31, 2011
easy as pie quilt
Well, here it is, the end of March already. Can you believe it? That means I have another stash pattern to share today. I'm calling it Easy as Pie. I love the vintage vibe it has.
It measures 58" x 70".
This was my initial fabric pull. I started with about 18 different fabrics, and edited a few out as I went (due to color), and added in a few more. So I would guess there are about 20+ different fabrics in all.
Materials needed:
3 1/4 yards total of various fabrics for the rectangles
1/2 yard for binding
3 1/2 yards backing fabric
60'' x 72'' batting or larger
Cutting:
cut 110 rectangles 5 1/2" x 7 1/2" from various fabrics
cut 10 rectangles 3" x 7 1/2" from various fabrics (these will be referred to as half rectangles)
Assembly:
There are two approaches to the assembly.
The first way is to layout all the blocks at once, making sure that each block is in a specific spot.
The second way is to randomly sew rectangles together to make the rows. Once all the rows are sewn together, they are arranged. This is a much more random approach, but somehow it always seems to work out in the end-especially if you have a large variety of fabrics.
Either way, the rows will be constructed the same way.
Sew 11 rectangles together, side by side. You will be sewing the 7 1/2" sides together, so the rectangles will be standing on end. Add a half rectangle to each row. Make 10 rows.
In every other row, the half rectangle will be the starting block.
In the alternating rows, the half rectangle will be the ending block.
Sew all 10 rows together, making sure to press the seams well. Quilt, baste and bind as desired.
If you use this pattern to decrease your stash, I'd love to see it!
Wednesday, March 30, 2011
destashing for charity
Convoy of Hope is a faith-based organization with a driving passion to feed the world through children's feeding initiatives, community outreaches, disaster response and partner resourcing.
I first heard about this organization through my church. They feed millions of kids per week around the world. When I saw the videos of kids that are benefiting from the work of this organization, it was both touching and heartbreaking. I heard that they were one of the first organizations to show up in Japan to help with the recent devistation. Their work there still continues, as you can imagine.
I spent the better part of yesterday morning listing my Flea Market Fancy fabric on ebay. I've never sold a thing on ebay, so I have/had no idea if anyone will even buy it. But, I have a lot of fabric and it's just been sitting here. In the big scheme of things, it seems silly, doesn't it? I've decided to sell it, with all the proceeds going straight to Convoy of Hope. It's the least I can do. I have kids that have full tummies every night. I can't imagine it any other way.
----
a few specifics...there are 23 different listings for flea market fancy so I'm not going to link to them...but if you do a search for "flea market fancy fabric" you should find them. (My user name is crazymomquiltsaj.) edited to add: you can find all the listings here. I also listed a half yard of Heather Ross' camper vans in blue here.
I left the auctions open for 5 days, so sometime this weekend the auctions will close. (I really can't pinpoint their timing system, it makes my head hurt trying to figure it out, so that's as specific as I can get.) If you feel so inclined to bid, I sure would appreciate it.
Tuesday, March 29, 2011
playing
I haven't understood all the dresden plate hype....until today.
It was my intention to make a dresden plate pin cushion. I made my own template for the pedals and jumped right in. My dresden ended up about 7.5" across. It's waaaay too big for a pin cushion, but will make a great pillow instead. It's definitely not the worst thing to happen. You can bet that I will be trying again!
Monday, March 28, 2011
leftovers
I finally got around to using the leftovers from this quilt....
to make some pretty quilt blocks. When I started, I had a fuzzy idea of where I was headed. After playing with them, I know right where I'm headed....straight to the fabric store to buy more Kona. :) I can't wait to see this one come together.
Happy Monday to you!
Friday, March 25, 2011
learn something new
I've been quilting for over 10 years now, and I'm amazed at how much I still don't know. Ok, let me rephrase that. I am amazed at how many things I keep learning. I'm not complaining....it's awesome! I've been wanting to share a few links that have been helpful to me.
First off, Carol wrote a great tutorial on single fold binding. I saw this tutorial, tried it and loved it immediately. I wouldn't use it for quilts, but for coasters, mini quilts, etc, it's perfect. She calls for cutting the binding 1 1/4'' wide, but I used a honey bun strip (which is pre-cut at 1 1/2'' wide) for this little coaster and it worked great. In fact, I think that it's the best use of a honey bun that I've come across to date!
Secondly, Anita did a wonderful tutorial on machine sewn binding. After reading her tutorial, I started thinking it was actually feasible for me to bind quilts this way. I was very scared to try it (it took me 6 months), but really, I didn't know how painless (and QUICK) it would be. I used the technique on this quilt, and I will definitely try it again.
I'm just delving into hand quilting, and this video on how to make a knot is awesome. I mean, I know how to make knots in my thread all too well. But this video helped me to learn how to be intentional in where the knots end up. :) This helped me a ton when I was working on all my applique leaves, too. (I just finished them this afternoon!!! YAY!) There is also a great video on tying off, or making an ending knot. Super duper helpful!
Lastly, I am sooooooooooooooo excited, because my husband gave the the go ahead to go to this retreat!
I met Penny at a retreat last November and her work is amazing! In fact, it was after seeing her paper piece at the retreat that I was inspired to re-work my band aid block idea into something a little more realistic. It was fun and this is something that I've been wanting to do more of.
But, have you seen Penny's paper piecing??? I mean, seriously!!! Check out her kitchen aid mixer block! I'm blown away and I can't wait to learn her techniques and some of her tricks. Plus, Tara hosts an AWESOME retreat. I know this from personal experience, so I am sure a good time will be had by all. I can not wait! There are still some spots left. If you are a last minute planner like me, it's not too late! :)
Monday, March 21, 2011
home stretch
When I was a kid, when we had to pick rocks, (which was NOBODY'S favorite job) my dad would try to encourage us to keep going strong until the end. When we turned the last corner he would often announce, "This is the home stretch". Those were always welcome words to hear, let me tell you!
I'm feeling that way with this quilt. I'm so excited to be on the home stretch. Only 25 more leaves to go! I do love this project. I've learned a TON about applique by just jumping in and doing it. But I am so ready to start assembling it into a quilt top.
On the flip side, I'm already looking for my next applique project. I love this one that Nicolette is working on, but it's WAY more ambitious than I am looking for. Any ideas?
Happy Monday to you!
Saturday, March 19, 2011
winners
The winners of the Tour Ireland books are Punkie Pie (Jen) and Frances! Please email me your addresses. Thanks to everyone for playing along!
Thursday, March 17, 2011
tour Ireland blog hop
Happy St. Patrick's Day!
To be honest with you, this isn't a day that I normally do a ton of celebrating, but I'm not opposed to it. :) Pat Sloan is doing a blog hop to feature her Tour Ireland book, and I'm happy to be joining in the fun. Tour Ireland is a book that documents Pat's trip to Ireland with a group of quilters. There are lots of gorgeous photos of Ireland included. (I want to go!) It's like a scrapbook and a pattern book rolled into one. It has some great patterns that I would love to make, scrappy style, of course.
This one is called Sheep's Feet. I think it's so clever. It's made from snowball blocks that alternate lights and darks. I don't think I've ever seen that before, and it makes the quilt quite interesting.
I just had to start one right away. I can already tell that I'm gonna love it.
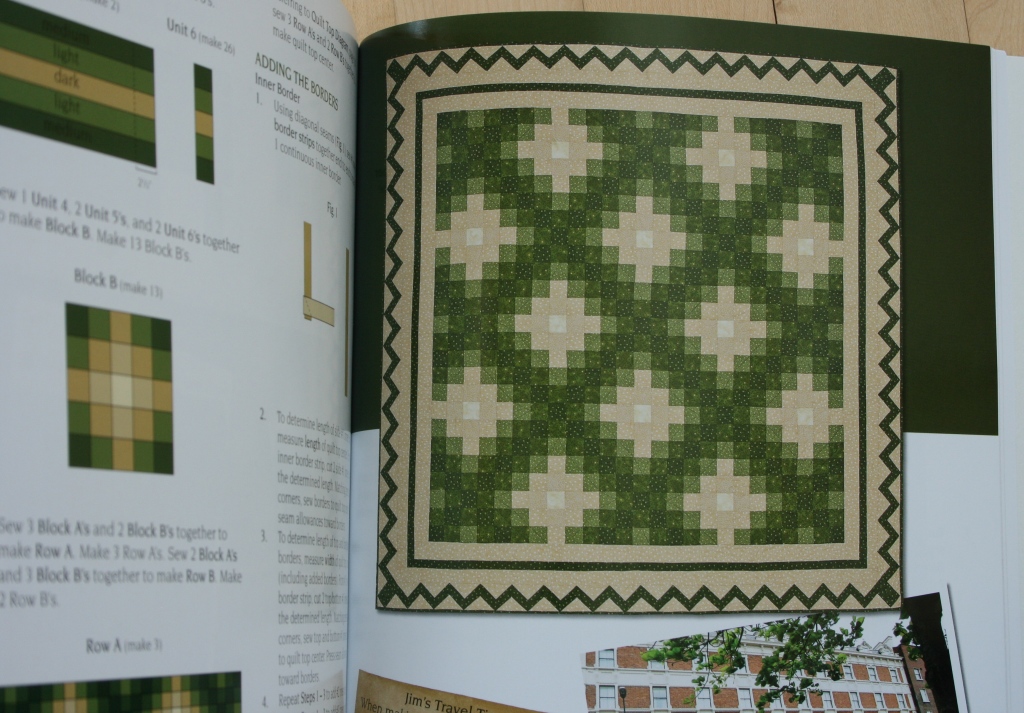
I do love an Irish Chain quilt, and this version is great. I love the gradient color and the zig zag border. Such a nice touch. I'm still trying to figure out how to translate this one into a scrappy version, but I'm sure I'll find a way. :)
Pat is offering her book at 25% off the regular price through the end of March. You can buy it here.
Or...you could stop at any of the places on the blog hop and try to win a copy for yourself!
Of course, you could leave me a comment here, too. In your comment I'd love to know if/how you celebrate St. Patrick's Day. I'll be picking two winners from this post that will each recieve a book compliments of Pat and Leisure Arts. I'll pick the winners on Saturday. Hope you have a GREAT day!
Wednesday, March 16, 2011
rags to riches
I started this quilt last Friday, on a whim, and I pulled it out of the dryer yesterday afternoon. It was such a quick project that it never made it to the in progress list. I'm not complaining one bit! That list needs some serious slimming down. And soon!
Here's the front.
And this is the back. I was worried about the color palette being a bit too broad, but it worked out just fine in the end. Phew!
It's quilted as it's made and it's not bound. Once it is assembled and the edges are clipped, all you have to do is wash and dry it. Easy enough! I have to admit, I went into this quilt having my doubts. But I'm pleased as punch with the results.
Before washing...
And after. :) It has such a great texture and weight. This is a different color palette than my normal, so it actually matches my house quite nicely. Hurray for that!!!
My daughter did a quick test run for nap-worthiness. I think it's gonna work just fine! This quilt is an instant favorite with my kids. Yay! I really, really like it, too!
It measures approximately 48" x 60".
A few thoughts on making rag quilts....
The process is messy! I used charm packs, which tend to shed a lot in the first place, then there was the clipping. There was a dust bunny fest in my craft room. It may have needed cleaning before, but definitely after!
The quilt wasn't all that impressive during the process. It took on a whole new life after washing and drying.
The best batting to use inside the squares is warm and natural or warm and white. The few 80/20 scraps I had were too puffy. The charm squares tended to shift a lot more than with the thinner batting.
Assembling the blocks was not my favorite part. I found it hard to sew very close but not over the layers of batting. The bulk of the batting kept pushing my walking foot to the side. I just did the best I could and tried not to stress over it.
The clipping was tedious and it started to hurt after awhile. Thankfully I had a good friend to talk to on the phone while I did the bulk of that. It made it much more pleasant. :)
Even after washing and drying, this quilt is still shedding. I'm fairly certain that will settle down after a bit. Here's hoping!
Subscribe to:
Posts (Atom)