Welcome to finish it up Friday!
I've been carrying my original scrap happy purse for over a year and a half. I had washed it a few times, used it almost constantly, and admittedly, it was looking a little bit shabby. I knew it was time to retire it, but I wasn't quite ready to let go. So....last night I chopped it up, discarded the worn bits, and "recycled" the rest of the outer panels by turning it into a zip pouch.
I used a funky old zipper that I bought at the thrift store years ago. I got a big eye brow raise from my husband for that choice, but that's ok, I think it matches perfectly! Besides, this isn't for him! Ha!!
It is lined with ticking and I plan to use it as either a make up bag or perhaps a knitting project bag. (or maybe I should fill it with scraps, since they are threatening to take over my entire sewing area!) It measures 12" wide x 8 1/2" tall x 3 1/2" deep. I just LOVE it!!! Hurray for recycling patchwork!
I DID finish a quilt this week as well...but I have big plans for the photographs, so the full reveal will have to wait. (Sorry if I'm being a stinker!) We shall see if the photos turn out anything like they will in my head. Here's hoping!!!
Now it's your turn! Please link up your finishes for the week. Thanks for joining me for finish it up Friday!
Friday, December 05, 2014
Wednesday, December 03, 2014
how to bind tiny things
A few weeks ago I bound a set of 5 coasters. Joining the ends of the binding strips is pretty tricky on pieces that small, but I figured out a way to make it easier! I recently bound this mini tree block, which measures 5.5" x 8". That's pretty little! I took a few photos along the way so I could share a quick tutorial on how to bind tiny things with you. Use this method for coasters, pot holders, mini mats, mug rugs, or teeny tiny quilts...anything small.
Start with a quilted piece.
Trim the edges down to between 1/16" and 1/8" beyond the quilt top.
Cut a strip for binding 1 1/2" wide and a few inches longer than the perimeter of your quilted piece.
Lay out the binding on the quilted piece as sort of a "dry run", if you will. Make sure to miter the corners as you go, laying out the strip as accurately as possible.
Measure an overlap of 1/4". Trim the excess. Normally, when binding and joining the ends with a straight seam, you would measure a 1/2" overlap. But, in my experience using this method, I've found that during the process of stitching the binding down, things stretch just a little bit. The 1/4" overlap was spot on for me, but your sewing machine/walking foot may vary from mine, so your results may vary a bit as well. Use the 1/4" overlap is a starting point. Adjust if necessary. (I'd be curious to hear how it works for you. If you try it, leave me a comment please!) Ok, now that that disclaimer is out of the way, let's proceed!
Take the piece to the iron and press the binding strip flat. Pin in place. See? No pucker in the binding whatsoever. Stitch the remaining part down, overlapping a few stitches where the seams meet.
Fold the raw edge in, then fold the binding over itself, completely enclosing the raw edges inside.
Hold in place using some handy dandy Clover wonder clips. (I LOVE them!)
Hand stitch the binding down on the back. This part is great, because it goes so quick!
Start with a quilted piece.
Trim the edges down to between 1/16" and 1/8" beyond the quilt top.
Cut a strip for binding 1 1/2" wide and a few inches longer than the perimeter of your quilted piece.
Lay out the binding on the quilted piece as sort of a "dry run", if you will. Make sure to miter the corners as you go, laying out the strip as accurately as possible.
Measure an overlap of 1/4". Trim the excess. Normally, when binding and joining the ends with a straight seam, you would measure a 1/2" overlap. But, in my experience using this method, I've found that during the process of stitching the binding down, things stretch just a little bit. The 1/4" overlap was spot on for me, but your sewing machine/walking foot may vary from mine, so your results may vary a bit as well. Use the 1/4" overlap is a starting point. Adjust if necessary. (I'd be curious to hear how it works for you. If you try it, leave me a comment please!) Ok, now that that disclaimer is out of the way, let's proceed!
Take the two ends of the binding strip and sew them together with a 1/4" seam allowance. Make sure that the strip isn't twisted.
Now, you should have a continuous loop of binding. Press the seam open.
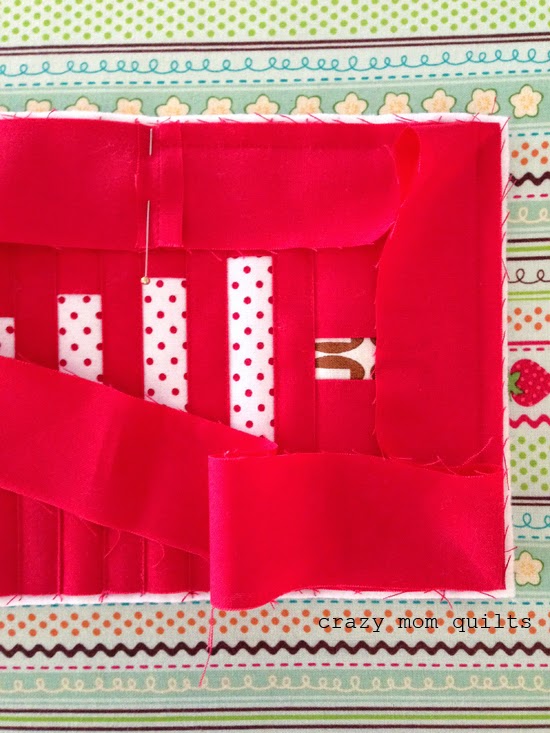
Place the seam on the side of the quilted piece (so it doesn't end up in a corner) and start stitching it down. The beautiful part is that you don't need to leave any tails for joining later. That part is already done!
Attach the binding to the quilted piece as you would normally, mitering the corners as usual.
At this point, all but the final corner (top right) has been stitched down.Take the piece to the iron and press the binding strip flat. Pin in place. See? No pucker in the binding whatsoever. Stitch the remaining part down, overlapping a few stitches where the seams meet.
And here it is, all attached! Isn't that slick?
Press the binding away from the front of the quilt. (it's not easy on a tiny piece!)
The binding will stand almost straight up. Fold the raw edge in, then fold the binding over itself, completely enclosing the raw edges inside.
Hold in place using some handy dandy Clover wonder clips. (I LOVE them!)
Hand stitch the binding down on the back. This part is great, because it goes so quick!
Here it is, all finished!
If you have any questions, I'll try to answer them in the comments.
Go forth and bind ALL the tiny things!
Monday, December 01, 2014
mini trees! quilt
Happy December! I'm happy to share a finish with you today! This is a miniature version of my trees! quilt. I love how it turned out, and as usual, I want to make 100 more!
I always get nervous when quilting smaller pieces like this (how backwards is that?) because I am afraid that the quilting will look big and chunky and that it will ruin the piece. (I can find anything to stress out about, let me tell you!) One night last week when I was unable to sleep, I forced myself to get out of bed and work on something. Anything. This was the closest thing to being finished, so I quilted it and sewed on the binding in the wee hours of the morning while the rest of my household was asleep. Going to sleep at 2am isn't recommended, but it felt good to make some progress. Sometimes that's just how it goes!
Photography is sooo tricky in the winter! I trudged about 1/2 mile through the snow at a local park to get a few photos. That was an adventure in itself! I had to explain myself to the man who was grooming the ski trails. That was fun. Hahaha!
But, it was worth it! Right before my battery died, I snapped this photo. It's one of my favorites! (The background is an old picnic table.) I love the red polka dot binding, too! (Fabric is confetti dots by dear stella.)
The mini quilt finishes at 15" x 22 1/2". If you'd like to make one of your own, I wrote up a pattern and it is available for purchase here.
Happy Monday to you!
Labels:
mini quilt,
patchwork,
pattern,
quilting,
quilts
Friday, November 28, 2014
a pillow for my brother
Welcome to finish it up Friday!
My youngest brother is a truck driver and he requested a pillow (or two?) for his truck. I didn't think any of the bright girly ones I had on hand were appropriate for him (hahahaha) but inspiration struck at just the right time. I had plenty of scraps leftover after finishing the mustard mishap quilt top, and since the scraps were still everywhere, I took the time to cut out some squares for a pillow. I basted it to some scrap batting and quilted it very simply. Super quick!
I finished it with the envelope backing that I had made, but didn't use for this project. It was SO handy to have a pre-made back! I love how subtle it is, too. (There is a simple envelope backing tutorial here. It's my favorite way to finish a pillow.)
The pillow measures approximately 20" square. AND, it is scrap project #94/101.
Even though I made this for my brother, I kind of (really) want to keep it!!!! I love the simple, utilitarian feel that it has. I suppose I could just make another. Ha!
Now it's your turn! Please link up your finishes for the week. Thanks for joining me for finish it up Friday!
Labels:
101 scrap projects,
patchwork,
pillow,
quilting,
scraps
Thursday, November 27, 2014
mustard mishap quilt top
I found a few minutes to sew this morning before all the thanksgiving craziness started. It felt great to finish this quilt top! As you can see, I did add the mustard into the mix. I love what it adds! I almost chickened out, but I'm glad I went with it! The quilt top is 100 scraps: mainly chambray, denim, linen, gingham and a few wovens. Many thanks to Anna for the bag of scraps!
The quilt top measures about 58" x 74".
Happy Thanksgiving to those of you celebrating today! I hope your day is fun and stress free. :) Thanks to each and every one of you for stopping by and reading my blog. I'm so thankful that you do. It means more than I can say. xo
The quilt top measures about 58" x 74".
Happy Thanksgiving to those of you celebrating today! I hope your day is fun and stress free. :) Thanks to each and every one of you for stopping by and reading my blog. I'm so thankful that you do. It means more than I can say. xo
Monday, November 24, 2014
mini trees!
Do you ever get one of those ideas that rattle around in your brain that just won't quit until you try it out? That's exactly what happened with these mini trees. I would think about them before falling asleep, when I woke up in the morning, when cooking lunch. After several days, I figured enough was enough and I finally gave the idea a go.
There was much squealing of delight when I made the first one. My kids squealed right along with me, which was a bonus. :)
I made 6 blocks.
Then 9.
Then I turned them into a mini quilt. I absolutely love it!!! Thankfully we have a fresh coat of snow today for photography purposes. (Ha!) The mini measures 15.5" x 23" and the pattern is in progress. Hurray for fun ideas that work!
Happy Monday to you!
Friday, November 21, 2014
Saturday socks
Welcome to finish it up Friday!
I'm so excited to share my finish for today....another pair of hand knit socks! I'm calling these "Saturday socks" and I knit them especially for my 11 year old son. He LOVES Saturdays, big comfy sweatshirts, being wrapped in a quilt (or two) and now he has a pair of hand knit socks to add to his Saturday ensemble. He's soooo excited for them, which I find absolutely charming. He's my middle child, so it is RARE that he gets new clothes, much less something made just for him. (It's usually all hand me downs.) I tell you, those middle children have it rough! Ha!
Turns out it isn't much easier to take sock photos on someone else's feet...
...but we had fun trying! :)
We joked that they look like old man socks. They do, but that works out, too. We always say he is an old man trapped in a kid's body. He's peculiar as the day is long and we love him to pieces.
These are my 10th pair of hand knit sock to date! My patterns are nearly worn out!
After 10 pairs, I finally feel like I can do a decent job at knitting socks! I've tweaked the pattern to my liking and I re-wrote it in a way that makes sense to me. I've got the PDF posted here as a free download. I'm not qualified to offer up technical knitting help, but if you want to have a go at the pattern, feel free to give it a shot!
Now it's your turn! Please link up your finishes for the week! Thanks for joining me for finish it up Friday!
Wednesday, November 19, 2014
sewing for the fun of it
A few weeks ago a friend gave me a huge bag of scraps. A garbage bag full! There were a ton of denim scraps, lots of linen, some gingham, and several assorted utilitarian type fabrics, among other things. I sorted through the bag and I thought this would be a fun and interesting palette....in an understated way, of course.
Yesterday I started to sew from that pile of scraps, just for the fun of it. And it was SO fun! I thought I would call this quilt "moody", because it matches the gray blustery weather we have been enjoying (ahem) here in Minnesota.
I've also been toying with the idea of adding a streak of yellow somewhere in the mix and calling the quilt "mustard mishap". The title alone entertains me so much, I just can't tell you! I think I'm getting a little loopy and already experiencing signs of cabin fever. (Although it's much too early in the season for that.)
Whether I add the mustard or not, I really like where this is headed!
I'm trying to convince myself that another WIP is not a big deal. I've added 3 in the last week! I'm up to 15 (official) works in progress with a few more that I'm still in denial over. It's a slippery slope.....
Monday, November 17, 2014
winner
The winner of the e-book Free Motion Quilting for Beginners (and those who think they can't) is Gill! Thanks to all of you who entered the giveaway.
Happy Monday to you!
Friday, November 14, 2014
doe quilt top
Welcome to finish it up Friday!
Yesterday afternoon I started making a contact print pillow (using the tutorial here). I love the pattern because it is simple and quick. Plus, it is a great way to showcase one mini charm pack. I made pieces for the envelope backing before I even assembled the pillow top, so I would feel like I was on the ball when I got to that stage. What can I say? I like to shake things up. :)
The fabric is Doe, by Carolyn Friedlander, which will be released in December. This is two weeks in a row that I've used new fabric. It feels great! (However, I'm not convinced that I've turned over a new leaf quite yet...)
At some point after I pieced the pillow top, I thought, "wouldn't this look great floating on a big solid background?" So I pulled out a yard of iron colored Kona cotton and tried it out.
Yep! Turns out it looks great floating on a sea of grey! I guess I didn't need those pillow backing pieces after all. (Figures, right???)
This palette is quite out of my comfort zone and I had doubts about it when I was laying things out. But, now that it's sewn up, I really like it! It's good to stretch yourself.
I love the simplicity of this project so very much. I also like how this project took a few unexpected turns along the way. It's keeps things interesting when a project takes you on a detour or two! Love that!
Now it's your turn! Please link up your finishes for the week. Thanks for joining me for finish it up Friday!
Yesterday afternoon I started making a contact print pillow (using the tutorial here). I love the pattern because it is simple and quick. Plus, it is a great way to showcase one mini charm pack. I made pieces for the envelope backing before I even assembled the pillow top, so I would feel like I was on the ball when I got to that stage. What can I say? I like to shake things up. :)
The fabric is Doe, by Carolyn Friedlander, which will be released in December. This is two weeks in a row that I've used new fabric. It feels great! (However, I'm not convinced that I've turned over a new leaf quite yet...)
At some point after I pieced the pillow top, I thought, "wouldn't this look great floating on a big solid background?" So I pulled out a yard of iron colored Kona cotton and tried it out.
Yep! Turns out it looks great floating on a sea of grey! I guess I didn't need those pillow backing pieces after all. (Figures, right???)
This palette is quite out of my comfort zone and I had doubts about it when I was laying things out. But, now that it's sewn up, I really like it! It's good to stretch yourself.
I like how the wide borders give this piece a gallery feel. Of course the quilting is going to make or break the quilt. (No pressure there!) Hopefully I can execute the fuzzy plans I have brewing in my head. The quilt top measures 42 1/2" x 43".
I love the simplicity of this project so very much. I also like how this project took a few unexpected turns along the way. It's keeps things interesting when a project takes you on a detour or two! Love that!
Now it's your turn! Please link up your finishes for the week. Thanks for joining me for finish it up Friday!
Labels:
finish it up Friday,
patchwork,
quilt,
work in progress
Thursday, November 13, 2014
Free Motion Quilting For Beginners (and those who think they can't)
I've had the chance to review the book Free Motion Quilting for Beginners (and those who think they can't), by Molly Hanson. I love that title!
I'm a big proponent of quilting your own quilts, as you know, and I've read a lot of books about free motion quilting. I like how everyone presents the information in their own personal way....there is always more to learn! This book presents all the practical information you need to get started. More importantly, it gives you the confidence to jump in and give free motion quilting a try. There are 15 projects in the book that encourage you to start small and increase your comfort level with free motion quilting before you tackle something larger, like a quilt. What I love most about this book is Molly's tone of encouragement throughout the text and the projects. She is great at guiding you though the entire process!
I've done a lot of free motion quilting and I love how relaxing it can be. I also know how easy it can be to get in a rut. I challenged myself to get out of my box, so to speak and try some new-to-me, designs. I gave this squared off stippling pattern a try and it went pretty well! I had to slow down and think about where I was going from time to time, but it was fun! I could see doing this all over a whole quilt.
I also quilted a few swatches of different designs and I turned them into a set of coasters. Binding them was a little fiddly, but totally worth it! (I can say that now that they are done. Ha!) These are great because I not only used scraps of fabric, but scraps of batting as well. Hurray! I'm happy to count these as scrap project #94/101.
If you would like the chance to win an e-book copy of Free Motion Quilting for Beginners, please leave me a comment in this post. In your comment, I'd love to hear what your favorite go-to FMQ pattern is. Or, if you are new to FMQ, I'd like to hear what pattern you would like to master. I will pick winner in a few days!
Subscribe to:
Posts (Atom)